
Maybe it's the fact that my cousin recently gave birth to twin baby boys that has me thinking cute and cuddly so often. When I saw
this cute purse by Jose Wiggers on line, I just loved the pattern for a quilt.
A warm blanked, the
Zoo Babies stamp set, and
two shades of blue on Vanilla make this sweet baby card. (Supplies list at the bottom of the post.)
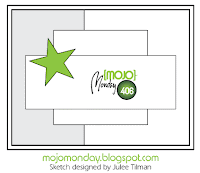
This sketch is today's Monday Mojo, and blanket was made using a technique from one of my quilter's books, which I have, but will probably never use for actual quilts. I have to put a limit on my hobbies somewhere!
 Here's how to make the blanket:
First, select your colors. You can use pattern paper or Designer Paper, but I chose to use solids, and gave them texture by using a different embossing folder on each one. Fine patterns work best. I used Night of Navy, Marina Mist, and Very Vanilla.
Because you will be working on the diagonal, your strips must be longer than the width of the blanket. My blanket was to be about 3-1/8" x 3-7/8, so I made my strips 4-1/
4
" long, although I could have made them even longer. The strips are 5/8" wide. I made 3 of each color.
Emboss all three strips at once to save time.

Now, cut a 4-1/4" x 5-1/2 piece of Very Vanilla card stock, and cover it with paste from a glue stick. It is important to cover the whole card, because you will be working with lots of tiny squares of paper, and they will try to escape if they can!
Carefully line your strips on top of the Very Vanilla card stock. Make sure the 5-1/2" edges are perfectly straight; trim with scissors or a paper-cutter if needed.
Use your paper trimmer to slice across the stripes, to make these new multi-colored strips. I used the same measurement of 5/8" to make my patches square. If you want, you can get diamond shapes by just making the new strips a little wider or narrower than the first go-'round.
Tip: a rotary cutting blade will work better than a v-tip slicer, because you are cutting through two layers and all that embossing. If you do use your v-tip slicer, you may need to go back and forth once to get a clean cut.
Here is what the strips look like when they're arranged diagonally & offset:

This is the look that you're going for as you put your "blanket" together.
Now take another piece of Very Vanilla, this time cut to 4" x 3-1/4. You may use your glue stick again, or if you prefer, Snail Tape or Fast Fuse.
Tip: the glue stick will allow you to slide pieces over a bit if you don't lay them down perfectly right away.
Line up your strip diagonally across the Vanilla card so that the corners of the squares that hit the edge of the card match up pretty well. You can see that both the corners of the Marina Mist square at the bottom and the Night of Navy square at the top line up to the edge of the card. If your patches are diamond shaped, the angle will be a little different.
Line up the colors corner-to-corner across the "blanket." Go in both directions from the first strip that you put down. Notice that the strip furthest to the left is offset. This is optional; it may or may not be convenient to do this to get the best coverage.

Turn the "blanket" over and carefully trim any strips that are sticking out past the edge.
Here's what it will look like so far:
Now, use the scraps to fill in any part of the design which still needs to be covered.

Turn over and trim again.
Lastly, (looking at the front) you may want to trim the quilt using your paper trimmer so that the corners of the top and bottom rows meet nicely with the edge. As you can see in the picture above, there is a little Vanilla sticking out between the blue blocks. I trimmed the top and bottom, and then squared up the sides.

There's your quilt!
I layered mine on yet another piece of Very Vanilla (measure your final blanket after all that trimming to get the right size) before putting it on my card.
The rest is a matter of using your blanket the way you want on your card.
For some other fun card making blogs, try
Mojo Monday, Cardmania Challenges,
Scrapper's Delights, and
Splitcoast Stampers


